How to play and counter every Card
Guides By Clash Royal 2016-05-30 19:53:38
THE TRAINING CAMP CARDS
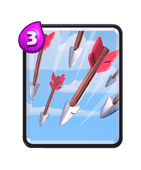
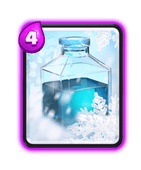
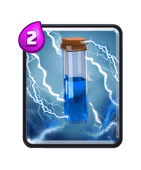
: A staple spell for most decks. Can be used to wipe out any swarm aside from . Usually 1 shots , , spear , , and the , assuming that you are playing an equal. Most of the time, it can gain the user an easy , as it gains a positive trade over the , , and , which is what most people use it for. Usually used for defense, but “pre-fired” can be used to gain a last moment win if played well. Certain “arrow-bait” decks will try to get you to arrow the , , or , (only one), and then your opponent will place whatever is left since you no longer have . If you play against an arrow bait deck, I recommend just killing the troops with a troop and then building a counter push, and save the for when it is imperative you play them.
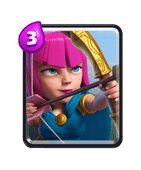
Archers: Slow and squish ranged unit, and pretty cheap in cost. They can be used to counter pretty much any troop, and do a decent amount of damage. Main advantage is that they cannot be arrowed most of the time, assuming you are playing an equal. Most troops can take them out with ease if they are alone, which is why they are best used to defend and counter push, or back up a push. They can do a lot of damage if left behind a tank, so make sure to take them out before killing the tank. Not really worth using spells on.
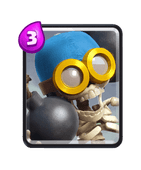
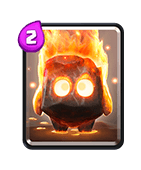
: I see this card a lot more in lower than high level . Usually used to back up a push. Great for taking out ground swarms, but cannot target air. Can do a lot of damage if behind a tank, but very vulnerable on its own. If there is a tank in front of him, make sure to kill the first if you are countering with ground troops. As for most splash damage ground troops (excluding the valk), placing your troops around him is the best way to deal with him.
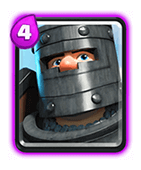
: Haven’t really seen him used much in the current meta, except by trainers. Low cost and tanky, hits fairly quickly and can dish out a lot of damage. A swarm, ranged, or air unit will counter him easily. Can be used to assassinate troops following a tank, such as a , , or . Most players just use , as they do much more damage and are like 4 smaller knights.
Mini Pekka: Another card that has a lot of potential if played correctly. Does a ton of damage, but hits slowly and is rather squishy. Good for assassinating swarm troops, or to kill a tank. Not very good on its own offensively, either needs some kind of splash support or a tank in front. Does a lot of damage even with one hit, so make sure it doesn’t reach your tower. I don’t recommend using it as a tank unless you have a or zap spell ready. Can also be used in it’s own hog cycle way with a mini pekka instead of the hog. Really good at stopping the . To counter it, simply place small swarms, range troops, air troops, or a defense (I recommend the ).
: Medium health range troop. Like a with less damage but only hits one troop at a time. Very versatile card, can deal a lot of damage quickly. Can be fireballed similar to the if the is one level higher. A and of the same level have the same health. Also easily assassinated because it is only single targeting. Good for stopping something then supporting a counterpush. Not great against swarms. Can do a lot of damage to a tower if left unattended to since she has a rather fast fire rate and each shot is pretty powerful. I don’t recommend letting a lone get off a bunch of shots, as she can easily chip off 600+ damage alone.
: A tank that is weaker but cheaper than the . Can do a lot of damage if it reaches the tower. Almost always followed up with support troops. Swarm troops or the will quickly take him down. The key to stopping a push is killing its support first. The can be drawn to the middle in order to make stopping him easier, as he only targets buildings. Usually played with a or + other small troops behind it, or with a . When facing , try to get your troop to target the first, or try to melt the as quickly as possible. Always be careful when dealing with support troops. If you mess up against them, they and the will reach the tower unopposed. Best played in the back so that you can slowly build up a push.
: A card that many people struggle against due to his speed and damage. Can easily solo a tower due to his high health and damage. Similar to the , don’t let him get his charge off. You have to think and react quickly when he is played. Cheap swarm troops are great for stopping him, one drop will counter him completely. Do not use a single expensive troop to stop him, just let your tower take the hit. A zap spell will stop his charge. A is also quite good to stop him if you don’t have swarm troops. I usually see him in push decks whenever they build up a push on one side and him on the other. If this happens, worry about the first and the support unit second. When the heat dies down, kill the tank.
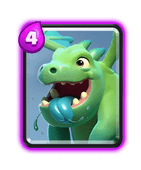
: Needs a buff in the current meta, but isn’t that bad of a card. Deals small area damage and flies. Good for push support since it is an air troop and most tanks are ground. , , and inferno counter it well and will still have a lot of health left. aren’t the best because it can two shot them. Big drawbacks are that it is slow, and has glitchy retargeting, and sometimes won’t actually fire because of that. It also just doesn’t do much damage, so it isn’t seen much in higher .
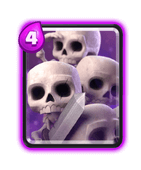
: Usually only seen in the low . Good for swarming, but also very easy to take out. Simply use a spell, /, or splash damage troop to counter them. I don’t recommend using them on offense, save them for stopping a tank quickly. Once they all lock on, the target will be gone quickly. To counter with , just place . For zap or , wait until they clump up on the target. Again, I don’t recommend it in higher due to the fact that it is easy to stop and gain an off of. If it gets to the tower though, it can quickly wipe it out due to the sheer number of troops.
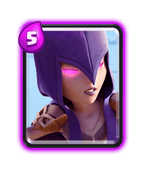
: Troop that makes more . Great behind a tank and supporting a push, not really good at all alone. Doesn’t deal that much damage over time, although she can kill and other small troops quickly. She deals splash, which is one reason she is good behind a push. Also, her are quite helpful in a push. But she still isn’t that good due to her low skeleton spawn rate, which is why I don’t use her.
GOBLIN STADIUM CARDS
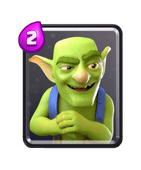
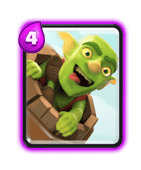
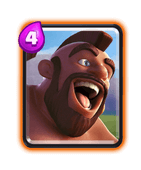
: Cheap, fast moving troop that can do a humongous amount of damage quickly. Used to counter slow hitting troops, or building targeting troops. Often paired with the because they do a ton of damage if they reach the tower. Can be zapped for even , but I don’t recommend arrowing them unless there is more value to be had. I like them more than the spear because they aren’t as squishy and do more damage, but they can’t hit air. Most troops will kill them quickly except slow ones like the or the pekka. Better to leave them unattended to unless your tower is locked onto something else and they get close.
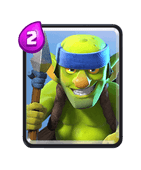
Spear : Weaker that target air. Very useful card, and seen in most decks as well. Can be used to lure troops, back up a push, or do chip damage. Usually won’t require a response unless there’s something tanking for them. Also not worth using a spell on unless there is a lot to be gained with the spell. Doesn’t do too much damage though, so make sure you play them properly. Can be used to stop a if you have nothing left, and can be used to slowly pick off troops.
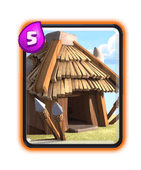
: The ’s partner in crime. Good for applying pressure and chip damage. If left unattended, will do a lot of tower damage over time. A direct damage spell can be used to take it out since it has much less health than a . Also quite good for backing up a push, as eventually they “snowball” and build up a considerable number. Deal with it the same way you would stop a , but don’t rush immediately because it only costs 5 instead of 7, so your opponent can easily defend. I recommend taking out the over the if you have to pick one, as most of the time, the are much more of a threat.
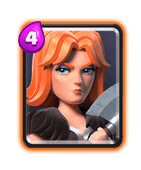
: Ever since it’s buff, it has been gaining popularity quickly. Tanky troop that deals out 360 splash damage. Fantastic against ground swarms and can be used as a tank for a push. Not wise to place barbs on her. She isn’t that tough however, so a range troop or defense can take her down before she reaches the tower. Valk+ or Hog is a combo I see a lot, and it can be especially devastating to people that rely on ground swarms. I definitely see this card more on defense, but it has a lot of potentially offensively. Good for stopping pushes as well since its health and damage will take out the support troops easily. Don’t use it to stop the tank though, have a high damage troop or building to deal with that.
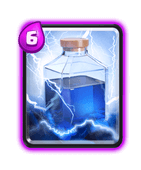
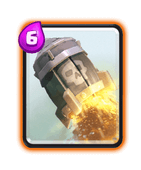
: Spell that is solely used for tower damage. Essentially just lets you deploy normal anywhere in the arena. Do not play this card on defense unless you have to. Most of the time it is either sent by itself, used to bait , or to push. Regarding the push, what most players do is put down something tanky that can distract the tower, and then put the down. If left alone, those three will do a ton of damage quickly. Many players just use a spell to kill them, as zap or gets a positive trade. Tips for using the are always keeping your opponent guessing where they will land by mixing up the landing zone, and waiting for when they use their spell. The card can be left alone for the first few times, but do not let your opponent keep chipping away. The impact damage is negligible. I don’t recommend zap or with since most players have a spell ready. I also wouldn’t worry about this card being used for anything other than tower damage.
BONE PIT CARDS
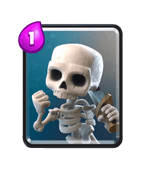
: Cheapest card and one of the best if played right. Can be used very effectively to defend against slow troops such as the pekka or . Also good for luring troops and “kiting” them across the river. Often used to stop a charging , or to bait ’s shot. Not really worth using a spell on, as they are extremely weak. One shotted by pretty much anything. However, 4 of them will do a lot of damage for a very low price, so I believe this card has a lot of potential if played appropriately.
: Same thing as the except there are 3 instead of 6. I like these more as they can perform the same job as (albeit slower) for a lower price, and are far less risky. A and of equal level have the same stats. Very good behind a tank and a cheap counter to ground troops like the valk or barbs.
: Kinda underused card that has decent potential. Pretty much only used for defense, but can do a lot of damage to a tower if a tank is in front. Great for countering the , pekka, or hog. Hog doesn’t work if they to early because the frozen releases non frozen when broken. Good for reinforcing, but should be used mainly for defense. Since it spawns one skeleton at a time, it can be used to provide a constant distraction in one lane. The itself can be hit by a spell to pop it easily because it has very low health.
: Opposite of the , does medium amounts of splash damage. Can quickly eliminate a ground swarm. Also very bulky, almost half of an arena tower’s health. Very good against spawner decks. Also can be used to stop a push that has a tank because it can usually hit whatever is behind the tank as well. Doesn’t hit air though, so be careful when placing it. A lot of people try to put a on it but most people have a counter to them, so never just send a out against a alone. Fairly expensive and must be played reactively, as the last nerf made it to where you couldn’t just put it down for 1/3rd of the match and wait.
: Weak troop with large health. Biggest advantage is his death bomb, which does a ridiculous amount of damage. Can be used offensively and defensively as a tank. On offense, he is a good tank that will kill whatever defense troops are used against him. On defense, he can stop an entire push with his death explosion. He doesn’t do much damage though, but make sure he doesn’t reach the tower. To kill him, place your troops behind him so that they don’t walk into the death bomb. He is really slow, so distracting him and luring him away from your tower is key.
: High risk, high reward. Like a slow, flying , and played similarly. Absolutely useless on defense, but will take down a tower in the blink of an eye. Does massive damage per drop, and instantly drops when it reaches the tower. Because of this, the key is to not let it get that first drop off at all costs because it will take down over 1/3 of your tower’s health. It is sort of tanky, but due to its speed, will be taken down quickly. and counters it super well unless you pre fire or your opponent. Also distracting it can be a good option, just used a high HP building such as the inferno or . When playing it, pre firing or a good will almost always guarantee a crown. Beware of the or the , because usually they will kill it without a problem, with or without a spell. Useless on defense though, I don’t recommend using it as a shield like you would a since most troops either can’t target it or will kill it very quickly. The death bomb doesn’t really kill troops but can be good to get that last bit of damage off of a tower because usually after 3 bombs, it is left with just under what the death bomb does. One experimental play I would suggest trying is following the with because they can take out without delay.
BARBARIAN BOWL CARDS
: My favorite defensive structure. Offers a ton of damage and a distraction for only 3 . However, it cannot target air and has pretty low HP. Critical for the current hog meta, as if played correctly, will counter the hog and gain you an , and minimal tower damage. Usually isn’t worth using a spell to take out unless you are running a hog deck. Also very good against either , the , and huts. Will stop most ground troops if played alone. Good way to stop a tank push as it pulls the tank towards the middle. Must be played reactively as it has a very short lifetime.
: One of the most common in the game at all levels, almost every deck I play that isn’t hog cycle or turtle uses em. Fantastic on defense, as they hard counter pretty much every ground troop that doesn’t do splash damage. Very tanky troop that does a ton of damage quickly. Can also be used as a blockade for the . Most of the time they are played on defense and then used to put pressure on the opponent because they rarely reach the tower. However, if they reach the tower, they will unleash a ridiculous amount of damage very quickly. To counter, simply use a splash damage troop, defense ( or ), air troop, or a . If you don’t have a counter in hand, your best bet is to place a ranged troop in the middle to draw them away. This can work pretty well because they are very slow. If all 4 are at good health crossing the bridge, I recommend countering them. If they are all at low health or only 1 or 2 of them are approaching your tower, leave them alone.
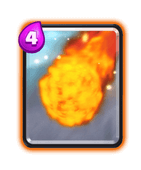
: Super high damage card, name explains itself. Does a massive amount of damage in a small area. Perfect for taking out any building, or in turtle decks. Most of the time it is used for buildings. Great against the because if placed in the wrong area, it can get off chip damage. Does a lot of damage against a tower, which is why it is used in some turtle decks. Also really good for stopping a big push because it can take out any kind of support unit, and if it is a group, gain you an . Good against . Since it costs 6 , you can usually rush your opponent if they fire it at your tower. Best way to deal with burn deck is to not keep placing stuff by your arena tower. Do not give them a reason to your tower and kill your troops. Will do noticeable damage over time, so be careful and watch your tower health. Also has to be aimed very well since it takes a while to reach its target and has a small area of effect.
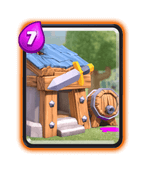
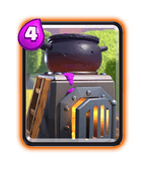
: Almost always used with spawner decks. Has a lot of health and spawns very slowly, and like the , is used to put constant pressure on one lane. If two are in one lane, it will be a real pain to stop them. A spell, spell, (if you time it right you can stop a wave and do damage to the hut), or is pretty good against it. If you run a deck without a big damage spell, your best option is to rush the other lane as soon as it is placed, as you opponent is only left with at most 3 to defend. A will shut it down for about half its lifetime, and the is also very good if they have a down as well. Never let your opponent set up. If more than 2 huts are in 1 lane, they will slowly overwhelm you. To play it, I recommend not putting it right next to the , and to only use it when you know your opponent is low on elix. Very risky to start off with.
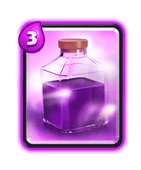
Spell: Very situational spell. Makes your troops and buildings attack or spawn faster. Still a pretty risky and not that great of a card in my opinion. It is best to keep it hidden until you have a promising push built up. A surprise pocket can get you a crown easily.
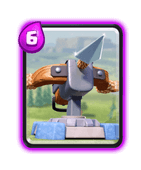
: Nerfed to oblivion, just like the . Deal with it the same way you would a . If you are using it, protect it as you would a until it locks onto the tower. Although it used to be a good card, it simply takes way too long to deploy and is too difficult to protect now. A spell will easily take down most of its health. Swarm troops also work because the xbow is single target.
P.E.K.K.A’S PLAYHOUSE CARDS
: Most people choose the over the because they do pretty much the same thing. However, the does offer air damage. Can do a lot of damage very quickly, and can hide from spells. Must be positioned correctly as its small area may not aggro your opponent’s troops. Low HP, so make sure to position it carefully. Do not use a spell on it unless it is above ground. A will not aggro to a frozen that is still underground. As with most defensive structures, play it reactively. Works well against the because it won’t pop up until he is in range.
: Another very common card, like the air version of . Squishy, but can deal an insane amount of damage very quickly. However, this is also one of the easiest to gain an off of. will one shot them, and zap+tower will kill them with you receiving zero tower damage. Never send out alone or if you know they have something that deals air splash damage in hand. Best left on defense as they can usually take out ground troops or a before your opponent can place . If used against , make sure to surround the , and don’t place them in front. If your opponent zaps them, they can be used behind a tank to counterpush, and will absolutely destroy a tower if they make it because zap usually won’t one shot them. Can be pulled mid similar to if you don’t have a counter in hand. One of the biggest mistakes I see is whenever someone has a down and their opponent places the . Never use it to stop a push that has some kind of air splash unit behind it, as it will die very quickly. Even surrounding won’t work, as they fly in a circle and will all die.
: The opposite of the . Locks on to a single target and quickly builds up damage. Hard counters every slow tank troop in the game. Can be paired with a distraction to quickly take out medium sized troops. Again, must be played reactively. Has decent health, so it can be used to tank. Not really worth using a spell on unless you are using a tank or hog. Very weak to swarms because it takes a while to retarget, so small troops can be used either to take it out or to distract it while your tank advances. Do not use it to counter swarms. Don’t place it as soon as you see a tank placed, wait until it crosses the river. Can be zapped to temporarily delay it, but not reset it.
: A very handy spell for making your opponent’s troops and buildings useless. Can be played both offensively and defensively. Most often paired with the devastating hog combo, but can also be used to stop an unstoppable push by freezing and then putting down a bunch of small troops or splash damage troops. The previous nerf pretty much only limited its use on defense. I strongly recommend not using it on defense unless you have a lot of left over since all you are doing is delaying the inevitable without troops or in hand. See my comment on the hog to figure out how to deal with hog . Usually if your opponent is using hog or by itself, they have a in hand. If you are going for the second or third crown, make sure to both the king tower and the remaining arena tower if the troops aren’t that big of a problem.
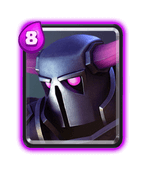
P.E.K.K.A: Another big tank troop. Less health than the , but significantly more damage. However, she is easily distracted, and rather easily countered. Kinda fell out of the meta after the previous update in the top leagues, but still used by some. Most often used with support units behind it, or in the notorious pekka double combo. The main thing to consider when fighting the pekka is not letting her reach your tower, as she hits like a truck. Due to her slow movement and attack speed, many small troop can quickly and cheaply overwhelm her. Again, kill the support unit first. The is a hard counter, but if they are playing pekka double , be ready for a spell. In my opinion, your best option is to lure her back and forth with small troops if you want a big .
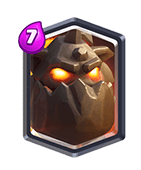
: The flying . Does almost no damage. Acts as a great tank since a lot of decks are very ground focused. However, the biggest advantage in my opinion is the death explosion, which releases baby lava hounds. Basically it is like a delivering thing, a minion barrel if you will. Best way to counter is inferno or distracting it and then putting down something that can target air besides spear . The key is not to panic, it doesn’t have as much health as most people think. Even if your deck isn’t air ready, a or some will kill it due to its low speed. Be very careful when it explodes though, the baby lava hounds do a ton of damage, similar to the . Another tip is to just let it have a go at a tower if time is running low because it does such little damage when alive. The main thing to do is kill whatever is supporting it. Also, you can rush immediately when the is placed because it costs 7 .
SPELL VALLEY CARDS
Zap: Another one of my personal favorites. Does small damage and stuns troops and buildings momentarily. Also can be used to temporarily stop an or charge. Will usually one shot small troops and leave with a sliver of health. Commonly used with hog cycle decks as it can stun the tower and whatever counter is place down. Trades off very well with , small swarms, and the for only 2 elix. Be wary of your opponent counterpushing with the weakened , as usually the will barely survive.
: Kamikaze troop, low health, high damage.. Very good against swarms, especially the and . They are very squishy though, and must be played carefully seeing as they have to reach their target. Will gain an over most troops if played correctly. If you have a massive push going, zapping or arrowing them may be a good option to save your push, as they do a massive amount of damage instantly.
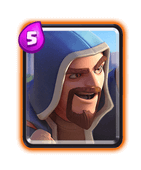
: One of the most common with push decks. Deals ranged splash damage. Has the same health as an even leveled and can be fireballed if the is one level higher. He does very high area damage however, so don’t underestimate a and a tank. Be careful when placing swarm troops on it as it can melt them all instantly. Since it is pretty much always behind a tank, kill the first and then worry about the tank. If he gets to the tower alone, just let him have a few shots unless your tower is low since he is pretty squishy. If you have to play swarm troops, place them around him, not in front. Another option is to wait until he locks onto something else and then kill him. The trick is to watch what he is doing and jump in at the opportune moment. He will destroy any small troop you put down instantly, so do not just keep putting down troops like , , or . My favorite way of using him is to let him defend, and then counterpush.
: Not a really great card in my opinion, haven’t seen it used with spawner decks. It simply spawns 2 at a time. Can be used to slowly chip away at a tower or defensively to stop a swarm. Feel free to make suggestions because I haven’t played this card much.
: Handy spell that is gaining popularity due to its many uses and the recent nerf. Really good for stopping spawners as it weakens the hut and whatever comes out. Also good on offense since it slows down whatever is in it. Many players either use it with spawner decks, push decks, or the new hog+ deck. It is rather slow in dealing damage, so make sure to place it where it gets the opportunity to deal the most damage over its lifetime.
: I personally think this card just puts you at an disadvantage. Puts down a copy of the previous card except it costs 1 more . Haven’t really seen it in use except in “who can put down the most _________ in one game” challenges. Please suggest any uses you have found for it and I will update.
: Very versatile card both offensively and defensively. His primary ability is not his damage, but rather his slow down effective, which renders other troops and towers almost useless. Perfect for pushing or defending. Also due to his high health, can tank a few hits. Do not him as he has much more health than the . When defending against him, make sure to kill him first or else whatever you put down is gonna be useless. When pushing with him, just let him work his magic.
BUILDER’S WORKSHOP CARDS
: Definitely the most used card I’ve seen. Used to gain an over time. Although you only gain 2 in the long run, it’s all about having 1 your opponent doesn’t while making good trades. If you can cycle back to it, 2 pumps will have you constantly sending out large pushes. With the recent nerf, direct damage spells will usually make it to where it won’t produce anything. No longer viable as a distraction/tank building. Best way to deal with one is to use your own or use a spell. In my opinion, it creates a faster paced game because you can cycle much faster. Good for pushes because instead of being left with a a few drops of , it will replenish and you can defend more effectively. If your opponent is using a , make sure to place it in front of the king tower, as they can slowly chip away at your if you keep placing them there. If your deck is over 4 avg cost, I recommend using the pump. Best placement is either behind an arena tower if they don’t have a , or in front of the king tower if they do.
: Nerfed to oblivion in the past update. “Defensive Structure” that is used to snipe of an opponent’s tower from your side of the river. Kind of difficult to pull of post update, as it does far less damage and taks a long time to deploy. Basically a slow, splash damage xbow. Can be very good for sniping buildings and defenses from your side of the river, but really not worth using post update. Also cannot hit troops that are very close to it. Most decks have a bunch of defenses or counter troops ready, so don’t just impulsively place down everything. A or spell can be used to gain an off of it because you can take out the and whatever is guarding it instantly.
: One of the strongest tanks in the game that is really annoying to deal with because he keeps exploding. He has three lives, and each one explodes. Although he can be swarmed by small troops, the explosion will kill them. Due to his high cost, you can rush the other side immediately once it is placed. Similar to any push deck, kill his support first. Due to his slow speed, you have plenty of time to figure out how to kill him after you get rid of his support. The hard counters the . He does do considerable damage though, so don’t let him reach the tower.
: The card that really hurts when you mess up. Although she is slow and kinda squishy, if she reaches your tower, its halfway gone. does an unbelievable amount of damage if she reaches your tower. The other thing you need to worry about is the splash. Make sure you don’t place troops in groups or next to the tower when countering. The best way to deal with is to swarm her and bait out the shot. You can do this by dropping troops right on top to where they surround her. This takes a lot of practice though, so don’t get frustrated. Alternatively, you can zap her and reset the charge. I don’t recommend air troops because most uses bring a tank and . To use , I recommend bringing a tank, having a spell ready, having a pump down, and having additional splash support behind.
: Great card for assassinating support troops and pumps. Also good for tanking for a bunch of swarm troops. Usually my opponents play him completely wrong though. He is not like a , he doesn’t do much to an arena tower. The best way to use him is to take out your opponent’s buildings, especially the pump, or to use him to assassinate troops behind a push, like a or . Alternatively, you can place a bunch of small troops and have him tank for them. To kill him, just deal with him like you would a . Spells do not work. Usually they place it on the sides of an arena tower or behind it. If there is a pump down, they will probably go for that. I recommend just using a troop to counter it, a defense really isn’t worth it.
ROYAL ARENA CARDS
: Should be a legendary card post update. A weaker that attacks from range. Outranges every defense except the and xbow (but no one uses them anymore). Main thing that makes this card fantastic is its positioning. It starts firing at the tower in a spot where its support units are behind it, so it is very hard to deal with the without your opponents support unit killing whatever you have. Also distracts the tower to where once the support unit finally squeezes past, both will start taking down the tower. It is essentially a with legs, and will usually get a couple of shots off. I recommend just letting it do a little damage and building a counter push off of it, or playing a reactive (hard counter) once it crosses the bridge. To use it, either drop off at the bridge and be prepared to defend, or drop at the back and build up a push. Troops such as , mini pekka, , or a bunch of small troops such as , , and will make short work. Make sure that you take out its support, even if it means you have to let it get a few shots off.
: As the name suggests, it is a trio of musketeers. Very high risk, high reward card. Almost always used following a tank. However, can be hit by , spell, or for a guaranteed . Therefore you must only play it if you know your opponent doesn’t have a direct damage spell in hand. If you have no spell, swarm them once they cross the bridge. If they are raged, do not place troops down as they will melt them. If they lock on to your tower, you’re probably screwed as three of them deal a huge amount of damage rapidly. Can also be used on defense since they deal a lot of focused damage, but usually I see them on offense. Since it is a very expensive card, if played in the back, rush the other side and don’t let your opponent build up a push. I recommend playing your tank first and then surprising them with your .
: Good card at high levels. Doesn’t do that much at low level. Always stop him before he charges. Do not put down an expensive swarm when he is charging. I usually see him paired with the . Since his damage isn’t high like the ’s is, just leave him alone if he’s by himself, or use a single high health/damage troop instead of a swarm. He can be used to stop a swarm push if placed in the back. In the current meta, I would recommend the valk.
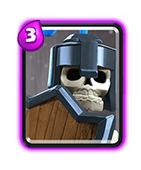
: Very underpowered card, not really sure on what to say about them. Basically the love child of a dark and a skeleton. Decent damage and health with the shield. Only thing is to not use a high damage spell on them since they will live. Again, I’m not really sure what they’re used for, so please make suggestions and I will update the post.
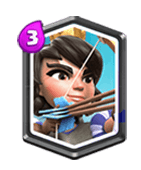
: The hardest card to counter in the game, in my opinion. Has a massive range and deals splash damage. Basically a walking set of that keeps on going. Absolutely destroys squishy troops, and makes every situation worse when defending against her. are the best counter. Alternatively, you can wait for her to lock on to your tower, and quickly kill her then, at the cost of some tower damage. Her main use is support though, any push is so much easier with her standing way in the back. She does fire rather slowly though, and doesn’t do that much damage, so I don’t recommend using her to stop a hog or something similar. You want to kill her as early as possible.
