How to build a Golem Deck
Guides By Clash Royal 2016-06-27 11:29:53
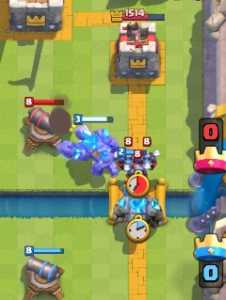
The is the tankiest card in the game. It has around 3,150 hit points at level one and goes up to 6,079 hp at max level (8). Not only it has the highest hit points but also have the ability to split itself to two golemites, which extends its life to deal and deal damage.
Being the highest hit points in the game, even surpassing the King’s Tower’s health at level 13, it has a high cost to keep it balanced. An of 8 and 3 sec deploy time makes this rock solid troop a strong and scary troop. If your opponent doesn’t have the right and appropriate strategy, they’ll definitely get wrecked by this titan.
So, how do you actually build a deck for ? It could be simple. Just follow up any damaging troop to add as a support/offensive ally. Just place it in the back line and your will secure you with his enormous health.
But you have to consider one thing, you have to make sure is that the deck you’re building is well rounded. There are different decks out there that are proven strong and effective. You must know how to counter them and that is what is all about in making your deck.
Strengths and Weaknesses
Lets talk about the ’s main weaknesses, first. Top of our list is the famous tank killing building, . is the best card to beat the . However, because of the ’s high health and splitting after death, you can survive the ’s damage with the right and strategy.
Second, any buildings can distract the to get to your opponents Arena Tower. It will delay your and will take unnecessary damage from your opponents defense. Since it has a very slow movement speed, he will take a lot of damage and can be killed before reaching the tower.
Third, and . The biggest strength of the deck lies within their powerful supportive troop in the back line. If it can be one shot by the or get killed easily by the , you’re going to have a hard time pushing.
Lastly, any swarm troop can hit the hard because of it’s slow movement speed and unable to target troop units. and Minion Hordes are the most important swarm troop that you need to pay attention to because they can deal lots of damage to the .
So, why choose a card for your deck?
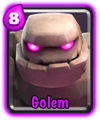
Mainly because, the is just an awesome card to use. The can be very intimidating for your opponents who doesn’t have the right /strategy to counter it. It offers you an enormous hit points that not even the could offer. Plus, it is very fun to play with it’s excitingly strong push.
Now that we know the main threats to our , let’s start building our deck.
As you know, swarm troops is the common counter for the . But the has enough hit points to take the damage that gives you enough time to deploy another troop to support the . Also, not all swarm troop are
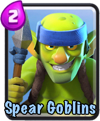
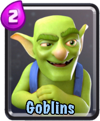
effective since the damage that occurs once the Holem explodes can kill low hit point troops in the area especially the , , , and Spear if they’re close enough to the .
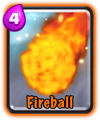
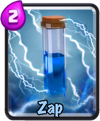
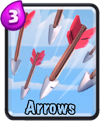
Aside from that, you can follow up with a spell like, , Zap and , whenever you can target many troops in the area of effect. Giving you the upper hand in the trade.
The card that we can add to the deck is a Spell card.
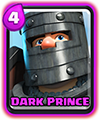
Now that we have our second card in our Deck, the next card should be a supportive troop. Ideally a splash attacking troop that will extend the life our . You can choose from a Bomb Skeleton, , , , , or even the or Dark as a supportive splash attacking troop.
Based on your liking or card availability, you can choose from these as your chosen supportive splash troop. But if you’re going to rank them, here’s my top three card;

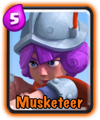
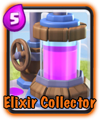
First, the is the best one to use because it is the strongest counter to and Minion Hordes easily. However, it has a high cost of 5 . As a user, 5 is already a high cost due to the 8 needed to deploy a . You have to wait a bit more and can be risky when your opponent decides to attack the opposite lane.

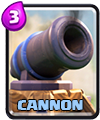
Second, the is a great card, too. It is one of the strongest card in the game because of its cheap cost of 3 and amazing range of 9-tiles. It can safely attack both air and ground units in a distance, killing potential threat to any swarm units like Minion Hordes and .

Third, the . Another cheap cost of 3 and can deal damage and slow the enemy swarm troop. It’s low cost is enough to follow up another card to support your push.
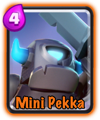
Now that we have a supportive card, it’s time to have an offensive card. Though the supportive card can be offensive as well, there are moments when you don’t need to wait for your to go for an offense. Especially when you don’t get the right card combination in your hand deck, yet. Possible offensive can be the , , Mini Pekka, , , and etc. These are the to use when the is unavailable to set an attack. You can also use these to split push your opponents when they invest in too much defense in your ’s lane. This can be a surprise card that they wouldn’t expect.They’ll be caught off guard when they got no left to counter it.
Another important card to add is a swarm troop. It will be your basic card used mainly for distracting enemy troops, defending and sometimes, it is the troop that survives and manages to destroy the Arena Tower with a low health Golemites. These swarm troops can be the , , andSpear . I’m not going to consider other swarm troops because they have much higher cost.

Finally, you must have building . Its quite obvious that a good deck must consist of one or two buildings. With the presence of Hog Riders and Royal Giants in higher , it is a commo card used offensively in the game, you have to play defensively against them and only having building will prevent them from damaging your Towers, effortlessly. The is the basic defensive building counter to the . But you can choose to have or as an additional option. Also, the Collector is actually not mandatory in a deck, unlike popular belief because of its high cost. Because of the collector’s lower hit points, it’s not a good defensive card against the and . Unless you choose to have another defensive building, the can still be a useful card to use if you prefer.
Tips and Strategies
#1 Slways wait for the 10 elixir mark
Using the is punishable in the cost. If you impatiently used the just as your gained 8, it will leave your towers defenseless, free from incoming attacks because of an empty . Waiting for the 10 mark before deploying your is important. Either you can wait for your opponent to deploy first and counter it or have at least 2 to prepare for a counter attack if your opponent chooes to attack the opposite lane.
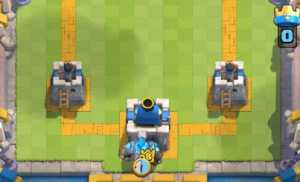
#2 Where to place your Golem
Basically, I only place my in 3 positions.
One, in the farthest area behind the king’s tower. Two, in front/Middle of the Arena Tower and Three, in the bridge near the river.
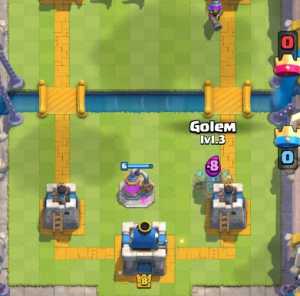
When there is no efficient threat in your opponent and no one is placing their yet, you can place your in the farthest area and prepare to go defensive until you have enough back up troop behind the .
Next, I only place the in the middle or in front of the arena tower when I got no good available and the troops are just low hit points like archers, , etc. The Arena Tower will take care of them while the tanks the small damage. Afterwards, follow up with a offensive troop behind the to push.
Lastly, I only put the in the river side in the bridge when I go full attack and I have another available. Unless you find your troops losing the push, I don’t put the in front near the bridge because it will be useless to deploy the alone. It’s not effective to use the as a split pusher because of its slow movement speed and low damage. By the time the arrives at the Arena Tower alone, your opponent will have enough to defend it.
#3 Always play defensively
There’s a saying that a good defense is the best offense. And that quote suites well with the play style of the Deck. You just have to be patient and play defensive before going full offense. You have to keep defending until you have the right available in your hand to play.
#4 Keep an eye for counter strategy
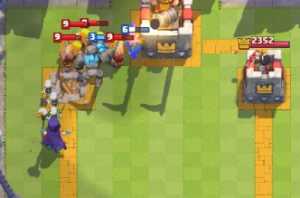
Remember that we discussed the ’s weaknesses early on. If they place immediately the , deploy your or to follow up with the . If the targets the first, Zap it so it will change target to the closer troop. Also watch out for swarm troops as it is usually used to counter the . Prepare your at the back or your Spell for unexpected Minion Hordes and .
Now, here are 3 sample decks that you can try and use:
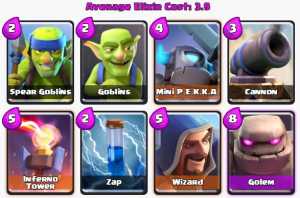
Golem Deck 1
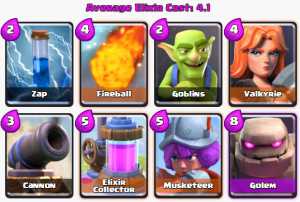
Golem Deck 2
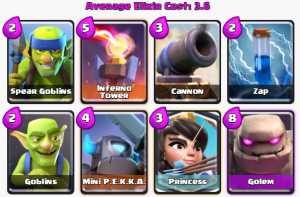
Golem Deck 3
Always practice your strategy by keep playing your chosen deck. You’re going to fight different decks from time to time and will lose and win some. If you find some card that counters your deck, think of ways how to counter it. Experiment with different troops and buildings and always play defensively. Eventually, you’ll get used to the play style right and easily predict your opponents next move by watching their .