Ultimate Guide to Using Balloon
Guides By Clash Royal 2016-06-29 09:03:00
Balloon Summary
Strengths
All in all, its strengths far outweigh the weakness!
- Flying ability: Can’t be easily countered by , Mini P.E.K.K.A, etc, like other tankers.
- Targeting: can’t be easily pulled to the middle like other ones. Placing it at the very corner can bypass the defensive buildings in the center in many cases.
- Damage: It has a perfect damage-per-hit.
- Death Damage: Upon death, it drops a explosive bomb which can easily finish off supports nearby.
Weaknesses:
- Speed: movement speed is medium, not like , Mini P.E.K.K.A, etc. Opponents will have enough time to plan their counters. But, in some deck, you can easily increase it by placing a behind.
- HP: As a tanker, HP is outclassed in HP by most other tankers. But, I usually think of it as a damage dealer, not tanker.
How to make the most of Balloon
In order to show you how to use , I would like to give you this deck and show you how it works. This is easier.
This deck doesn’t require any high level and is the only Epic. In addition, because I talked about these a lot before so I will make the Breakdown section below simple. If you have any question about using these , don’t hesitate to comment!
Cards Breakdown
- – Yes we are talking about so this is an obvious choice.
- – He can soak damage and protect while it is getting to opponent’s Tower.
- – Tanky and has good splash damage. She will help you deal with lots of distractions and swarms.
- Archers – Good damage and can’t be 1 hit by Zap.
- – Very versatile card and can be used in lots of situations.
- – This will help you deal with , swarms and .
- – Obvious choice. These guys are very useful and can be placed in almost any deck.
- : You can replace it with If you have problems with . If you don’t have either, is a great choice! All in all, is still the best choice If you want to push further with this deck
General Gameplan
The main idea while using this deck is to get the to opponent’s Tower and chip it away. And here are some variations of pushes you will want to use:
Full Push: If done properly, this push can easily destroy a Tower. In addition, because this push takes lots of so you will want to do it in the x2 time, depending on how much pressure you are being placed on.
- Place the behind your King’s Tower. Because this push takes lots of , you will want to have enough to build it before the reaches the bridge.
- Add a support troop behind to protect the , to prevent opponent’s small troops from chipping him away. It can be either Archers or . If your opponent doesn’t have air troops, would be nice (play her behind your ). Just remember, let your cross the river first, Otherwise opponent buildings will target your support troops.
- If you have enough , play your right behind the . Opponent troops can’t kill your because he has enough HP to soak damage while your supports behind are dealing damage. And the will be totally safe!
- Get your ready because your opponent will usually over-commit and play lots of troops at the same time.
+ : Play the right on the bridge and followed by , make sure your is ready. This combo is deadly If your opponent doesn’t have air defense in hand (bad opening hands at the beginning). Ideally, launch this combo after placing your .
+ : Play the right behind the you are taking the . Your will get 1-2 hits off but still can devastate the Tower.
+ Archers: Cheap but very effective, especially after defending with Archers.
Balloon Placement
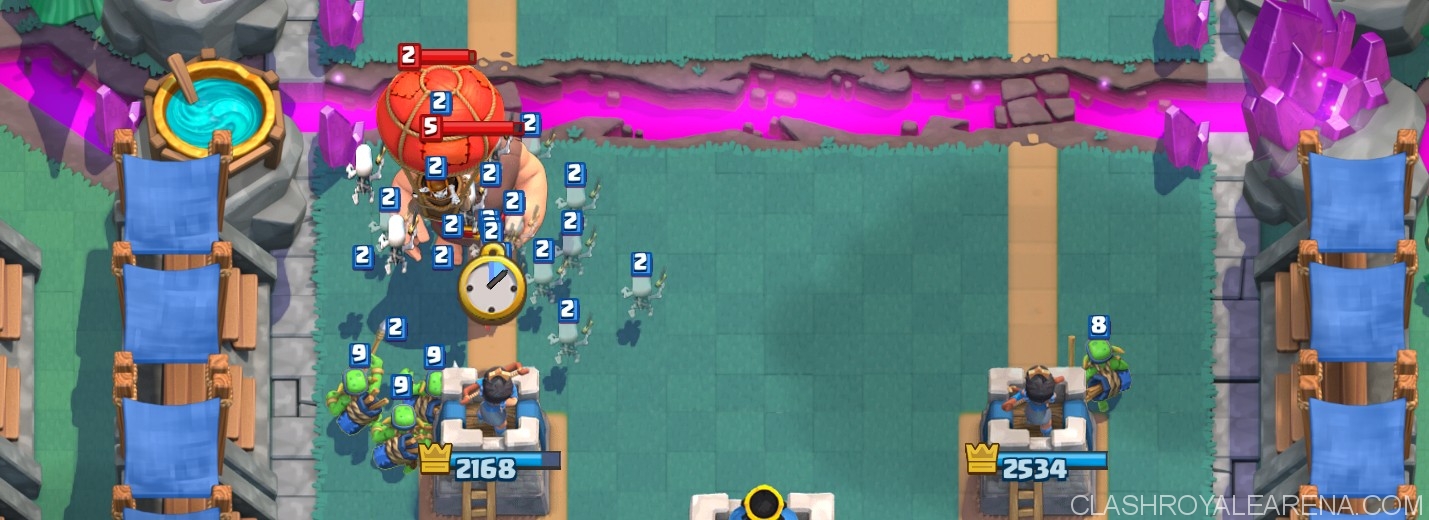
We all want the to soak all the damage so we need to send him in first. The must be behind the otherwise it will be taken down quickly. Your opponents will always try to take down the first because it definitely does more damage than the . Truly it is pretty hard to catch the properly because:
- has a larger footprint than . He completely covers the perimeter of as you can see inthis image.
- Sine the is walking on the ground and the is flying, it is very hard to tell whether or is exposed. A wrong move can make the Tower destroyed.
Direct Counters
Your opponents will likely try to use some of these following strategies to stop your pushes:
- : destroys a in just 3 hits so If your combo played well, throw your and get the positive trade.
- Playing Building: This is largely ineffective If the can’t be killed before the get there, as your can destroy most buildings in just 1 hit. The exception should be and you will need the help from your .
- – If your opponent can hit your , it will not make it to the Tower. So, you will want to place your combo correctly.
- – again, it is about placement. If you let your opponent lock on to the it will not make it to the tower. If it locks on to the , his tower is likely going down.
Matchups
These are some popular matchups we face everyday!
Push: Drop your (or ) out of the opponent’s support troops attack range, then place your right on top of those supports. is enough to deal with , , , Spear , Archers,…
Hut Decks: If your opponent places a down, immediately play everything you have on the other lane. He will not have enough to counter things properly. Most of the time, you can take down the first Tower easily, then, play defensively. Otherwise, play defensively and wait for the opportunity.
Double Decks: Use to soak damage then use either Archers or to take them out.
: Place right in front of your Tower. If played well, the will even not able to hit it. If you don’t use , is always an obvious choice for this!
P.E.K.K.A Push: Pull the P.E.K.K.A to the middle first then use to deal with supports behind her. would be enough to take her out.
Breakdown – are your best choice as they acn withstand the lifespan of the .