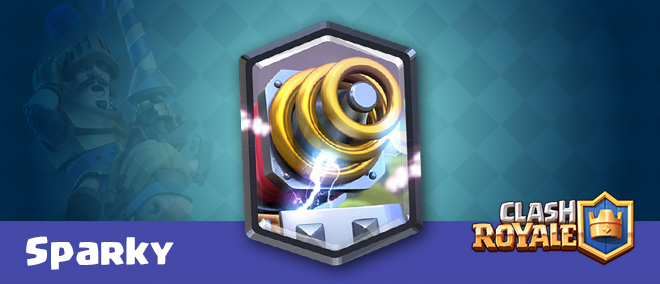
Sparky
Troop Cards By Clash Royal 2017-08-25 10:54:45
“Sparky has a heavy-handed approach to life: Obliterate everything in sight.”
- The Sparky is unlocked from the Builder’s Workshop (Arena 6).
- She is an area damage, medium-ranged troop with high hitpoints and very high damage.
- A Sparky card costs 6 Elixir to deploy.
- The Sparky takes the appearance of a siege machine with a Tesla coil mounted atop of it.
- Sparky is capable of taking out high hitpoint troops such as Giant and Royal Giant in just a few hits.
- Players can also use Sparky to counter the P.E.K.K.A. However if the P.E.K.K.A is two levels higher than Sparky, it could be risky as P.E.K.K.A might survive Sparky’s hits and eventually kill Sparky due to her very high amount of damage and hitpoints.
- As Sparky deals immense damage, she is best used as a high damage support troop, ideally behind a tank like the Golem, P.E.K.K.A., or Giant.
- Rage can significantly increase the damage output of Sparky and her support units, allowing them to take out towers with ease.
- Sparky’s damage can be wasted on weak troops like Goblins. Make sure to have splash units such as the Bomber, Princess, Wizard, Executioner or Fire Spirits behind her to kill low hitpoint troops and clear the way for Sparky.
- A Tornado pairs extremely well with Sparky since it can clump up troops, allowing the Sparky to hit all of them at once. This also applies with supporting units like the Wizard. Deploying the Tornado next to the Crown Tower could potentially allow the Sparky to critically damage or even destroy the tower along with any troops deployed to protect the tower.
- A potentially lethal combo is Sparky with Goblin Barrel, as it forces your opponent to Zap either of them. Whatever they choose chooses to Zap, it’s the wrong choice and they will receive heavy damage. However, this combo can be shut down fairly easily. Play Skeleton Army behind your Crown Tower while zapping the Sparky. The Goblin Barrel is crushed and the Sparky now has a steady stream of skeletons heading her way.
- A P.E.K.K.A. is good with a Sparky, as her high damage will eliminate any medium health troops trying to kill the Sparky. However it is very weak to swarms so bring a splash damage card to defend.
- Sparky has many counters. All swarm class cards can destroy a lone Sparky and can absorb an attack (except Minion Horde). Guards, Battle Ram and the Dark Prince are particularly effective due to their shields. As long as the shield is up they cannot be killed by the instance of damage that destroyed the shield.
- A lone Sparky may be countered with a Tombstone. Due to the Sparky’s slow attack speed, the spawned Skeletons will distract her indefinitely. If placed correctly, the Skeletons can distract Sparky while the Arena Tower will kill her. Even if the Sparky gets a hit on the Tombstone, the 4 spawned skeletons will cause more distractions.
- The Graveyard is an effective but expensive counter for a lone Sparky, as it will distract her for a maximum of 8 seconds and has a high chance of destroying her. The random nature of the spawned skeletons means any supporting splash units are ineffective against Graveyard, leaving plenty of time for you to deal with the push.
- Splitting Archers in the centre will require the Sparky to shoot 2 times, giving your tower time to kill the Sparky for a relatively low cost. However, it is advised to simply use the Goblin Gang or Skeleton Army as they can be placed on top of Sparky to counter her for the same price and more reliably.
- High damage cards like the P.E.K.K.A., Giant Skeleton, Rocket and Lightning can cripple if not destroy Sparky. However, Sparky does deal area damage within a large radius so poorly placed Barbarians and Goblin Gangs will be wiped out immediately. Another thing to remember is that Sparky hardly ever comes in alone so your Minions may be vulnerable to support cards. For the same reasons, Guards and the Dark Prince will absorb one attack but will be taken out quickly and the P.E.K.K.A. may not target Sparky.
- Cards that stun or interrupt an attack will be incredibly effective against Sparky. They will disarm her for at least 5 seconds, leaving plenty of time for your troops to destroy Sparky. Lightning, Freeze and Electro Wizard are particularly effective. Lightning cripple Sparky, Freeze disarms supporting troops as well and Electro Wizard will make it impossible for Sparky to attack. However, the Electro Wizard can easily be killed with a high damage unit like the P.E.K.K.A., who can one-shot an Electro Wizard two levels lower. Also if the Electro Wizard is badly placed, the Sparky will kill it.
- Sparky hardly ever comes alone. Use this to your advantage and attack the other lane to force the Sparky user to defend, and prevent them from creating a Sparky combo. However, make sure you have enough Elixir to defend against the Sparky. Because of this, only try to reveal the Sparky once you finish the push.
- Sparky’s slow movement speed often results in all of its support bunching up around her. This means it is very easy to gain large positive elixir trades with a Rocket or a Giant Skeleton and Minions combo. Rocket can destroy Sparky’s 6 levels lower than itself and can destroy all support troops in the game. The Giant Skeleton tanks for the Minions, allowing them to heavily damage or kill enemy units. When the Giant Skeleton is defeated, his bomb can finish off most troops.
- There is a loading screen hint that directly refers to the Clash Community’s nickname for her. Calling Sparky “trash can on wheels” hurts her feelings. This may suggest that Sparky is a sentient being.
- Its tip resembles a level 7 Hidden Tesla from Clash of Clans placed on a wooden cart with wheels. The same tip appears on top of the Level 7 Clash of Clans Laboratory.
- When fully upgraded, she deals the highest damage per hit of any card in the game, at 1,898 damage.
- Even a level 1 Sparky deals more damage per hit than the level 8 Balloon, the previous record holder of highest damage per hit of any troop, with 1,300 damage as opposed to the Balloon’s 1,158 damage. A level 1 Sparky even deals more damage than a maxed mirrored Balloon, (level 9 Balloon) which does 1,272 damage.
- However, Sparky has a thoroughly average damage per second due to her hit speed, which is tied for slowest alongside the Mortar and she also has the slowest attack speed of any troop.
- Sparky can destroy an Arena Tower, provided the tower is 1 level below its own level, in one shot. In fact, at max level, the Sparky can destroy a level 5 tower in 1 shot.
- The Level 6 Sparky (obtained via Level 8 Mirror) does 2,080 damage per hit. This currently makes it the only card capable of doing more than 2,000 damage in one hit.
- A Sparky does even more damage than an equivalent level Rocket, the previous record holder of highest damage per hit of any card. Ironically, she cannot survive one.
- She is currently the only card who has had her description changed three times.
- She is tied with the Princess for having the widest splash radius of any troop, at 2 tiles. However, she has a 3.5 tile splash graphic.
- An enemy Sparky always drops her wheel when killed. The other troops that drop items are the Knight, the Mega Minion, the Dark Prince, the Guards, the Executioner and the Cannon Cart. Strangely, when the player’s Sparky dies, she drops nothing.
- She is one of the eleven cards who are cheered for by the audience upon spawning and booed when killed, the others include Electro Wizard, Lava Hound, Royal Giant, Giant Skeleton, P.E.K.K.A., Giant, Night Witch, Bowler, Inferno Dragon, and Golem.
- Sparky is heavy enough to push a Golem.
| Hit Speed | Speed | Deploy Time | Range | Target | Cost | Count | Type | Rarity |
|---|---|---|---|---|---|---|---|---|
| 5 sec | Slow | 1 sec | 4.5 | Ground | 6 | x1 | Troop | Legendary |
| Level | Hitpoints | Area Damage | Damage per second |
|---|---|---|---|
| 1 | 1,200 | 1,300 | 260 |
| 2 | 1,320 | 1,430 | 286 |
| 3 | 1,452 | 1,573 | 314 |
| 4 | 1,596 | 1,729 | 345 |
| 5 | 1,752 | 1,898 | 379 |
Summary

Article Name
Sparky
Description
She is an area damage, medium-ranged troop with high hitpoints and very high damage.
Author
Clash Royale Guides
Publisher Name
Clash Royale Guides
Publisher Logo


